|
|
The ABC of airbrush handling and cleaning |
 |
by Christian Jakl, photos taken by Wolfram Bradac |
| |
| |
| |
 The airbrush has evolved into the probably most important tool in the past
few years. Reasons for this are probably the reduction in price and fact
that many modelers want to present their work with a perfect paint job.
The paint brush increasingly takes on a secondary role as even small parts
are painted with the airbrush. Therefore it is important to learn a little
more about handling and cleaning.
The airbrush has evolved into the probably most important tool in the past
few years. Reasons for this are probably the reduction in price and fact
that many modelers want to present their work with a perfect paint job.
The paint brush increasingly takes on a secondary role as even small parts
are painted with the airbrush. Therefore it is important to learn a little
more about handling and cleaning.
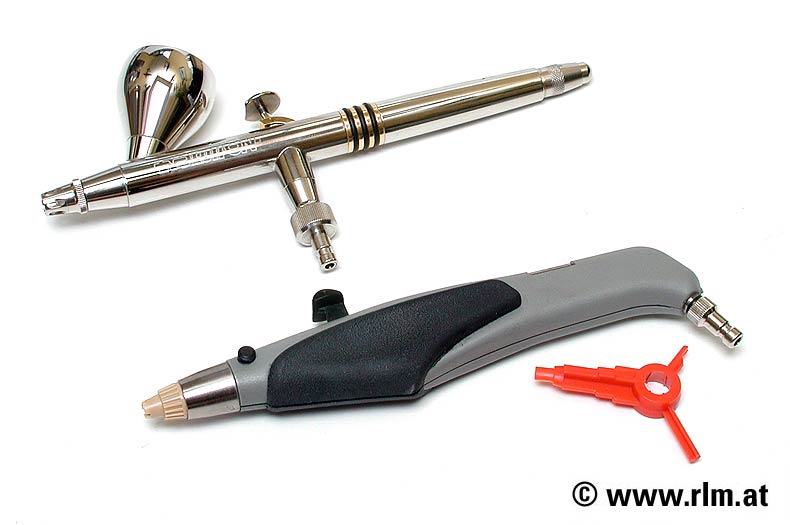
In this article we shall discuss the cleaning and various useful practices
in handling the airbrush. We have chosen two systems that we use: The Evolution
EVO TWO IN ONE and the AZTEK 470. The EVO represents almost all metal airbrushes
that are similar in handling and design. For the AZTEK 470, there are no
comparable products and falls outside the standard airbrush systems. Cleaning
materials are the same for both systems.
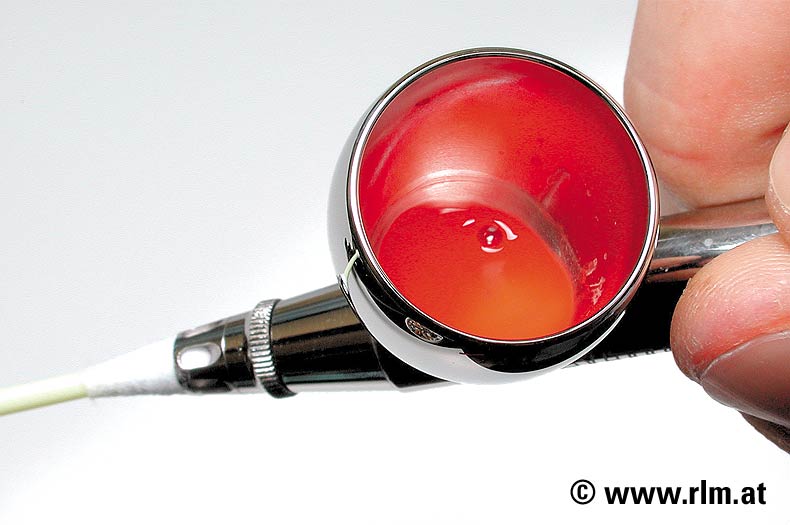
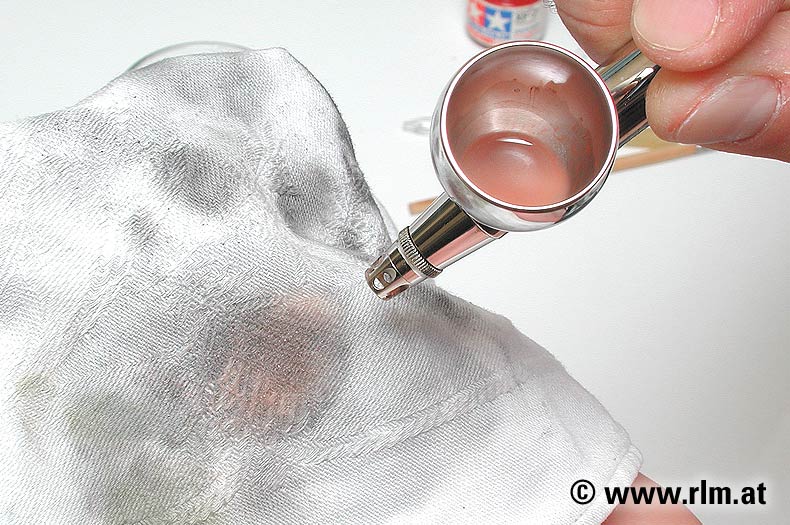
 Colors: Colors:
We have chosen Tamiya red for our color tone. First because it provides
a better contrast for photography and second because Tamiya colors are one
of the most popular lines for aircraft and military modeling. We thin the
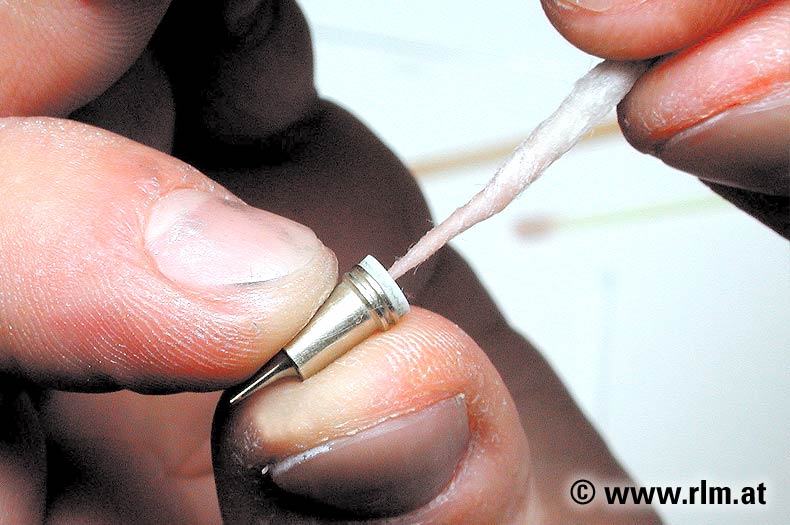
color right in the color cup. We add the color and then the thinner (Isopropyl
alcohol). Then we close off the nozzle with the help of a Q- tip and carefully
press the trigger. The air cannot escape through the nozzle and finds its
way into color cup. You will notice the bubbles in the color cup. Careful!
Press the trigger lightly and don't pull it back. With the AZTEK you can
put your finger right on the nozzle since there are no air outlet slots
near the nozzle. |
 |
| |
| |
|
|
|
|
|
| |
|
|
|
|
|
| |
|
|
| |
| |
|
|
| |
|
|
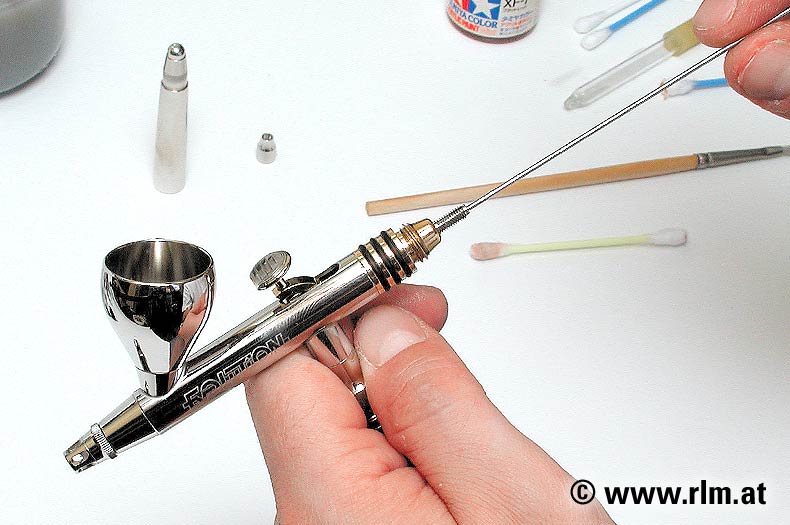
| Image 1: |
EVOLUTION (above) and
AZTEK (below) |
|
| Image 2: |
Close the EVOLUTION - nozzle
with a Q-tip. |
|
| Image 3: |
| With the AZTEK, the finger suffices. |
|
|
|
| |
|
|
|
|
|
|
| |
| |
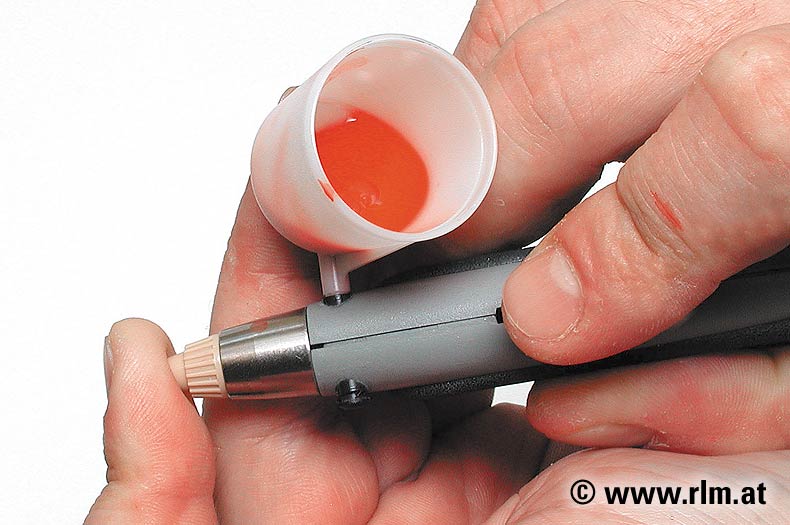
| Tips: Do not thin the colors below 1:3 (1 part color to
3 parts thinner). The air brushed surface will be smoother the more thinner
one uses. If you do not thin the enough the surface will be rough. Furthermore
color transitions will not be as neat and lines harder. I recommend to practicing
on a white piece of paper to see how well the color was thinned. With LIFECOLOR
paints you should not thin right in the color cup since it has a tendency
to foam up. |
|
| |
| |
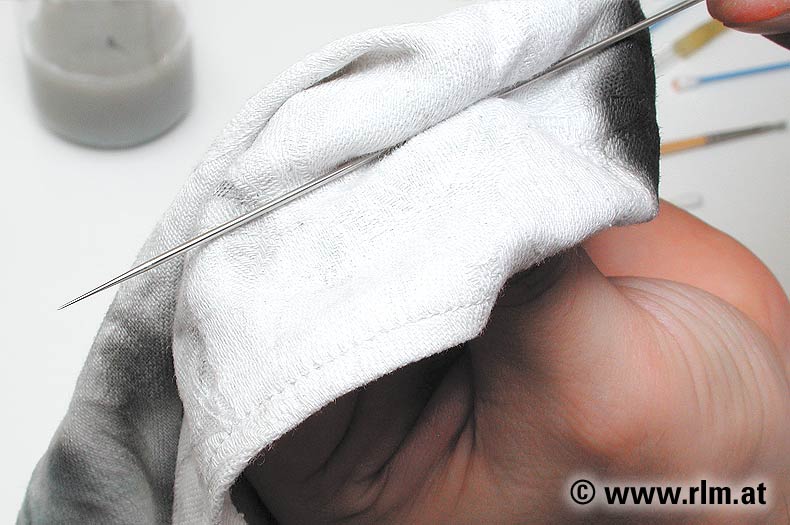
The
quick clean:
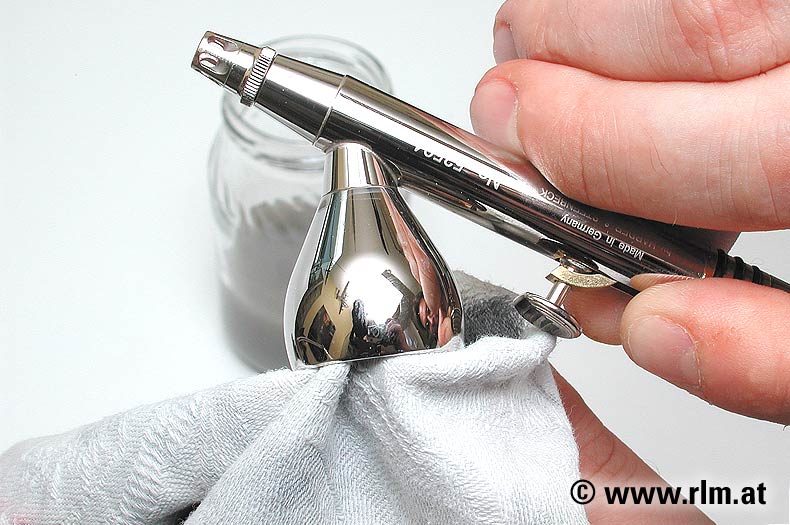
It is not advisable to make a complete cleaning of the airbrush after every
color because of the time factor, it is therefore recommended to quick clean
the airbrush before the color change. When one color application is complete
the extra color left in the color cup should be poured back into manufacturer's
bottle. The remaining color should be sprayed unto a cloth until no color
leaves the airbrush.
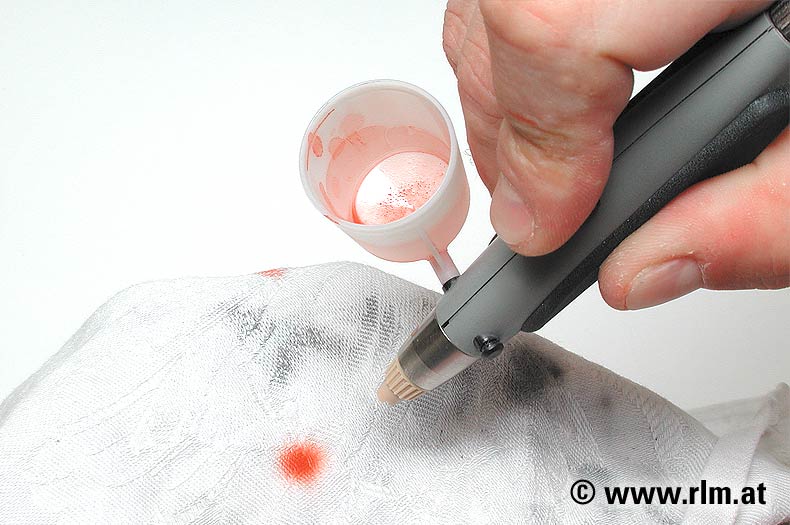
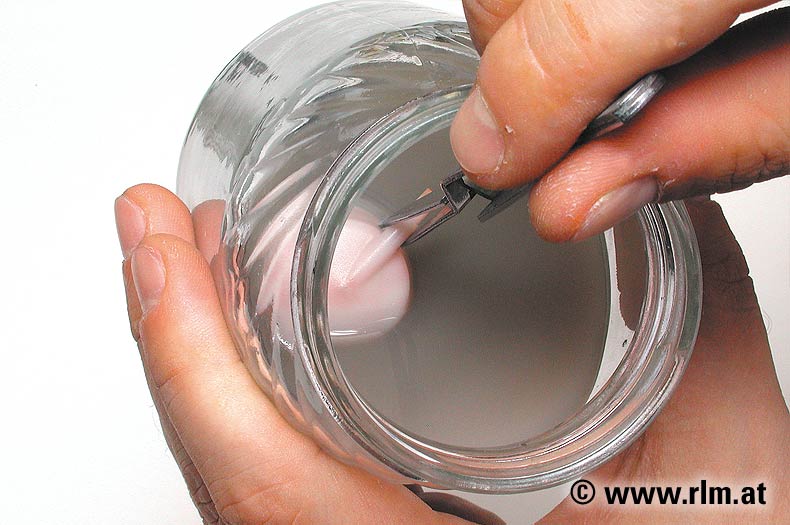
When this is complete the differences in the two systems become apparent.
The AZTEK 470 is well designed for the quick color change because the color
cup can be quickly removed and replaced by another one in the set. Meanwhile
the original color cup can be placed into a container with Nitro thinner.
Fear not! AZTEK parts are not attacked by Nitro thinner. Before a new color
cup is attached the airbrush should be cleaned with Nitro thinner.
The two glass containers provided with the AZTEK always contain Nitro thinner
on my work table and are used only to clean the airbrush. You won't get
away with such a quick cleaning approach with the EVOLUTION 2. You have
to fill the color cup with Nitro thinner and blow it through the airbrush.
Stubborn remnants of color can be wiped off with a cloth or a clean Q-tip.
This also applies to the AZTEK. |
|
|
|
|
|
| |
|
|
|
|
|
| |
|
|
| |
| |
|
|
| |
|
|
| Image 4: |
Fill Nitro thinner directly into
the
color cup. |
|
| Image 5: |
| To clean spray into a cloth. |
|
| Image 6: |
| Clean color remnants in the color
cup with a cloth. |
|
|
|
| |
|
|
| |
| |
|
|
| |
|
|
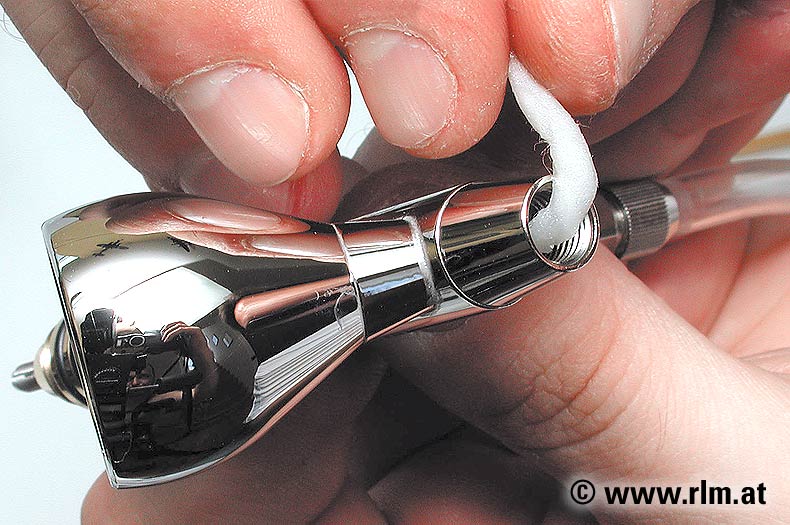
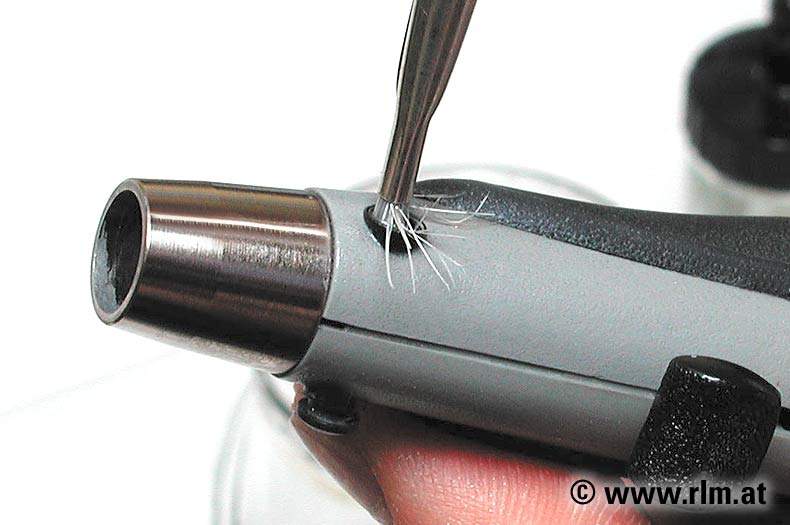
| Image 7: |
| Clean the nozzle with a Q-tip. |
|
| Image 8: |
| With the AZTEK spray out all
excess color remnants |
|
| Image 9: |
| The color cup can be placed into
a container with Nitro thinner. |
|
|
|
| |
|
|
|
|
|
|
|
| |
| |
Tips: As you can see in the picture, the Nitro thinner
has been used quite a lot. It will clean parts for months without having
to be replaced. Think of the environment when dealing with such cleaning
agents. Neat and clean work does not require clean thinners. This also goes
for the cloth used in this article. Since the Nitro thinner is also a degreasing
agent it will dry out the skin very quickly. A hand crème is recommended
after the work session.
LIFECOLOR and VALLEJO colors cannot be cleaned with Nitro thinner. Ammonia
(window cleaner) can be used for that.
The
cleaning station:
If the smell of Nitro thinner or Ammonia bothers you, then you can buy the
Cleaning Station made by AZTEK. There is also an extension available in
order to use more than one airbrush. The construction is simple: a screw
on retaining ring, a filter and a jar. During use no smell or liquid can
escape. You simply stick the nozzle into the upper elbow and the thinner
is sprayed through the filter into the jar. The price is rather steep at
40 Euros and one has to regularly replace the filters. The reward is practical
and a user friendly operation. |
| |
| |
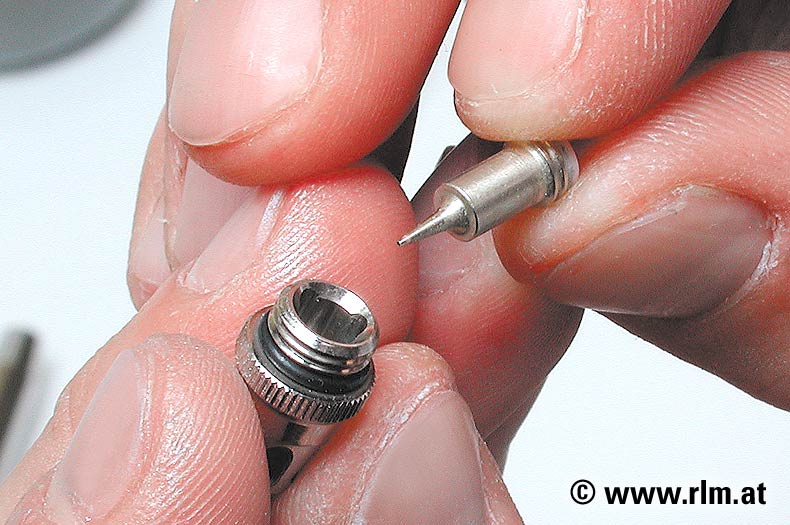
The
cleaning of the EVOLUTION TWO IN ONE:
If one believes that the airbrush is clean even after the spraying of various
thinners and the airbrush appears to be "optically" clean, think again.
Only after one takes the airbrush apart, does one become aware of color
remnants within. After intensive use,a complete clean up is necessary. The
EVOLUTION has a removable needle. That means color can spread from the nozzle
to the adjustment screw. The first move is to re move the needle. Careful
with the point of the needle, if bent it is very hard to fix.
Then the nozzle can be screwed off. The EVOLUTION nozzle is made up of two
parts, the housing and the nozzle head. There you will also find the Teflon
seal. Handle the seal with care and do not place it for long periods of
time in Nitro thinner. When all parts have been disassembled they can be
easily cleaned. Wipe the needle with a cloth from the back to the front.
Cotton wool drenched in thinner can be used to clean tubes and crevices.
There are various cleaning sets on the market. |
|
| |
| |
|
|
|
|
|
| |
|
|
|
|
|
| |
|
|
| |
| |
|
|
| |
|
|
| Image 10: |
| Remove needle carefully. |
|
| Image 11: |
| Wipe needle from back to front. |
|
| Image 12: |
| The nozzle is removed. |
|
|
|
| |
|
|
| |
| |
|
|
| |
|
|
| Image 13: |
The nozzle is disassembled
into two parts. |
|
| Image 14: |
| All orifices are cleaned with
thinner drenched cotton wool. |
|
| Image 15: |
| Take care with the nozzle, clean
only with soft material. |
|
|
|
| |
|
|
|
|
|
|
|
| |
| |
Tips: Important! The needle needs to be removed first
during disassembly. During assembly push the needle through after the nozzle
has been installed. This is one way to avoid damaging the needle. If the
EVO is not in use for long time it is better to remove the needle and inserted
just before use. It has happened that after less than thorough cleaning
the needle has gotten stuck in the housing and upon forceful removal has
been damaged. Never use pliers or other hard surfaced tools to remove a
needle!
The
cleaning of the AZTEK 470:
The 470 consists mostly of hard plastic and it does not have to be handled
as carefully nor is it as complex. The needle attached to a spring sits
firmly in the nozzle, the matter what nozzle one chooses to use. When the
nozzle head is removed so is the needle. The needle is made of very hard
material and is not easily damaged. The nozzle is removed with a tool that
is supplied and one immediately notices that the color does not have to
travel very far.
This means the color stays in the front of the airbrush and with normal
use does not spread to other parts. The nozzle can be left in the Nitro
thinner overnight. If there is a problem and one has the feeling that it
is clogged one can disassemble the nozzle. The needle assembly can be removed
from the housing with slight turn, as can be the needle and spring from
the assembly. Now they can be cleaned. On the AZTEK 470 the color in and
out channel can be cleaned with a bristle brush. |
| |
| |
|
|
|
|
|
| |
|
|
|
|
|
| |
|
|
| |
| |
|
|
| |
|
|
| Image 16: |
| Disassembly with the AZTEK tool. |
|
| Image 17: |
| A slight turn and the needle
assembly can be taken out. |
|
| Image 18: |
| The spring can be taken out too. |
|
|
|
| |
|
|
| |
| |
|
|
| |
|
|
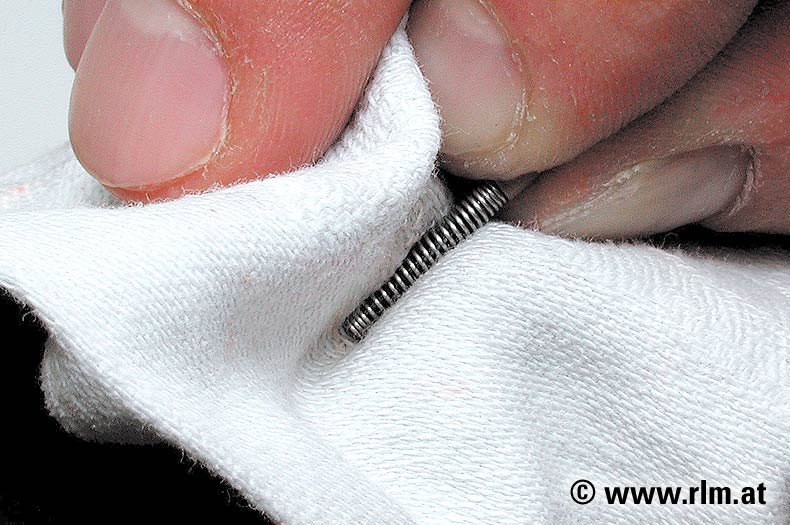
| Image 19: |
| push the needle through the cloth
in order to clean better. |
|
| Image 20: |
| Orifices of the AZTEK ... |
|
| Image 21: |
| ... can be cleaned with a bristle
brush. |
|
|
|
| |
|
|
|
|
|
|
|
| |
| |
Tips: The needle is fastened to the spring. Should the
impression arise that the fine point nozzle does not do fine work any more
then it is possible to pull the spring apart and therefore bring it into
a better extended position. That means the spring pushes the needle a little
harder to the opening and the trigger can be adjusted accordingly. When
attaching the nozzle to the airbrush listen to the noise. A squeaking noise
means that the nozzle is tightly attached. Never put oil or grease on the
threading.
General
Tips :
General tips: In various forums on can read about common problems encountered
while airbrushing. The airbrush spits or no color comes out. Mostly there
are minor causes for major problems. Spitting can happen when various parts
of the airbrush are not screwed together properly. So look at the assembly
carefully and tighten whatever seems loose. If the problem persists it is
possible that a seal is defective. With the EVOLUTION it could be the seal
inside the nozzle.
With the AZTEK the whole nozzle. If no color appears then there are two
possibilities. First the needle is stuck or somewhere in the nozzle there
is too much dried paint. Be careful when working with Future. Never leave
the airbrush without immediately cleaning out the Future. It will clog up
the whole airbrush. The same is true when using thinned out white glue.
General
mechanics of the AZTEK airbrush:
AZTEK 470 has a lifetime guarantee. If you open the body of the airbrush
the guarantee is void. All dealers are not as efficient and what is supposed
to take two weeks for repair may last two months. If one takes the chance
and opens the AZTEK nevertheless because something is not working right
this is what one can expect.
The AZTEK 470 is not glued nor screwed together. In order to take it apart
one has to pull out the rear part. Careful! The parts are placed or stuck
in place. Upon opening those parts might fall out. |
|
| |
| |
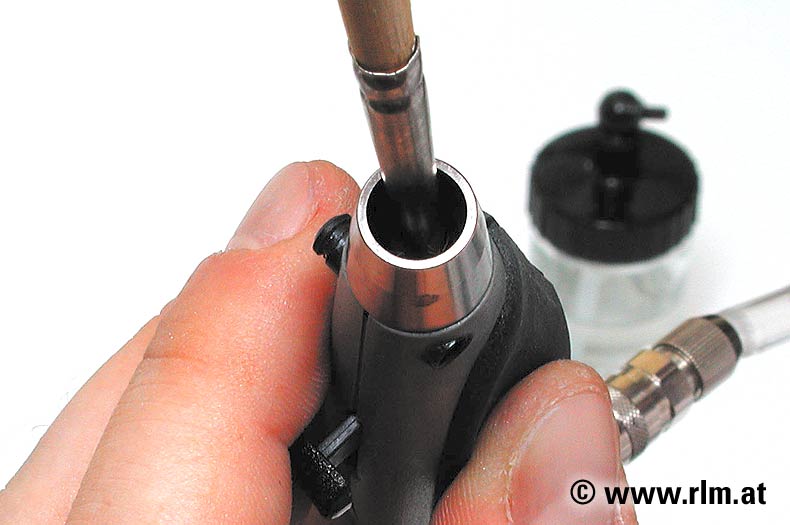
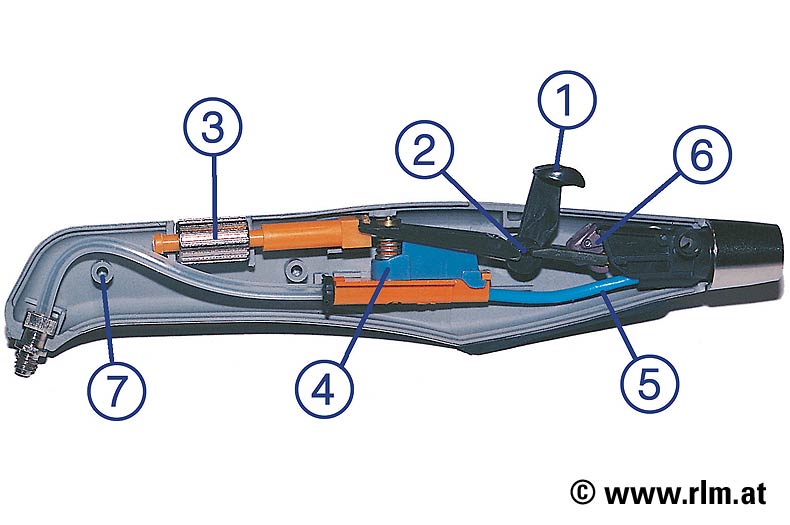
| (1) The trigger. It has happened quite often that the
trigger wobbles back and forth loosely. The reason is simple it slid out
of its plug type connector (2). The problem can be fixed quite easily. The
color distribution roller (3) is a robust part of this airbrush and will
present few problems. The air valve (4) will also work without problems.
The front air hose attachment (5) is also stuck into place and will present
no problems. Make sure the blue hose is firmly in place. Only the mechanics
of the metal pin that regulates the needle (6) may present problems when
taken apart. The insertion of this part requires some dexterity. The AZTEK
470 is held together in three areas. With the metal ring in front and two
plug connectors in the housing. (7) |
|
|
|
|
|
|
|
| |
meet the author |
|
|
|
| |
Christian Jakl |
|
|
|
| |
|
|
|
|
| |
I was born in Vienna in 1971 and now I live in the middle of the mountains in the Tyrol district. I am in marketing and my specialty is graphic design and layout. Ships, planes and automobiles is how it started and now I have taken up aircraft models only. I concentrate on the German and Soviet air force. My favorite mode of display are dioramas in 1/48 scale. Here I can let my imagination run wild and can produce many of parts. Experimentation and the use of new techniques are foremost on my mind. I also combine stock kits with other add ons and try out new tools. There is always a lot to learn.
It is not all that important to me if a detail is no exactly in the right spot; the final product has to look right. If somebody stands in front of my model and is enthused then I did my job right. The only problem I have is the time factor and in this I probably not alone. I wish everybody a lot of fun with this page and hope that critiques and comments are forthcoming. |
|
 |
|
| |
|
|
|
|
| |
Email:  jakl.christian@gmx.at jakl.christian@gmx.at |
|
|
|
| |
|
|
|
|
|
|
|
|
 |
 |
This page: THEMES: The ABC of airbrush handling
and cleaning
was last modified on: Oct 28, 2004
The URL of the page is: http://www.rlm.at/cont/thema06_e.htm
© Copyright www.rlm.at
and the contributing author(s). All Rights Reserved. Used with permission.
Terms of use: All material within this site is protected under copyright
and may only be reproduced for personal use. You must contact the Author(s)
and/or Editor for permission to use any material on this site for any purpose
other than private use! |
| |
|