|
|
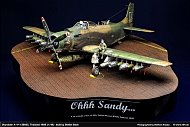
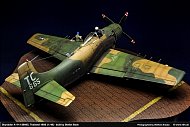
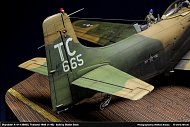
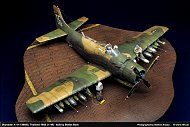
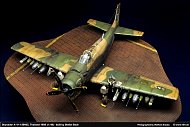
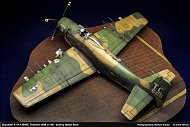
Ohhh Sandy - Skyraider A-1H 139665, 1st SOS, Thailand 1968 |
 |
built by Stefan Beck (1/48) |
| |
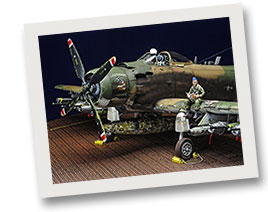
Sandy? Right - Sandy was the radio call sign of the A1-Skyraider in the Vietnam War. To get the Grunts out of trouble or to clear a hot LZ and prepare a helo landing, the Sandies were called.
Her ability to carry a high payload (up to 3600kg on 15 hardpoints) and 4 integrated machineguns (20mm) she was the right tool of trade for this task.
Another advantage of this prop driven airplane was her low airspeed, nothing better to escort a slow flying helo than an A-1, existing F-4 Phantoms just wouldn’t do the job. Further benefits were the flying properties at slow speed and the sturdy design. So this kind of aircraft was quite popular with the pilots and soldiers in country.
 Building ... Building ...
By the way, "Tamiya" is also quite popular with scale modellers and they offer some variations of the Skyraider. I choose the 1/48 scale model of an Airforce bird, as it is common practice, I searched for useful add ons, and a lot you can get, but first things first.
Most important is an original to get inspired by, "Osprey" is a sure bet. This time it was Osprey Combat Aircraft 97 (USAF and VNAF A-1 Skyraider Units of the Vietnam War), highly recommended stuff with loads of interesting pictures, among others a nice shot of A-1H 139665 (Lieutenant America), fortunately you get markings of this airframe on a "Iliad Design" decal sheet. So let’s built some Skyraider!
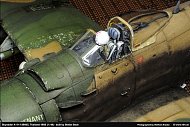
The "Tamiya" kit is apparently not state of the art so all the goodies which I purchased would help, can’t resist the aftermarket. On first sight the biggest problem is the lack of riveting on the airframe, "Rosie the Riveteer" comes handy for this boring task, didn’t expect that "Tamiya" would do such a poor job on this issue. This was followed by the cockpit section, all of the "Aires" parts plus some "Eduard" etchings were used. A typical Airforce feature was the Yankee ejection system which came from "True Details" (Yankee ejection system is basically a rocket which pulls the pilot seat by a wire out of the fuselage, against more conventional designs where the seat is pushed by a charge underneath or in the backrest).
Painting of the cockpit section is not a challenge, "Vallejo" colors were used, quite easy with details like this to get nice results. Next step was to close the fuselage halves, some filling and rubbing later the front glazing could be inserted. To get a clean nose line you have to, again, putty and sand a lot followed by some rescribing of panel lines. March on for the wings! The kit wheel bays are nicely done but nothing to "Aires", so I used these resin parts and glued the upper and lower wings together... now you can observe the massive offset of the panel lines (up to 2mm), putty, sand, rescribe, ... AGAIN! |
| |
| |
 |
|
| |
 Painting ... Painting ...
Since the marriage between fuselage and wings was done, filling and sanding is mandatory, it was a good occasion to mount the weapon hardpoints (pylons) from "Aires". Now it’s time to get some paint on the A-1. Masking the glazing is the first step followed by a basecoat of white. While the paint is drying I moved on to the undercarriage with some details by "Eduard" and the beautiful wheels from "True Details".
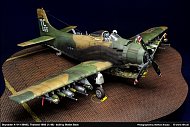
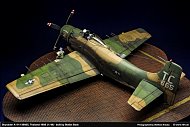
Due to the original (Lieutenant America) choosing the colour was a breeze. 1st SOS (Special Operations Squadron) 1968 based in Thailand used the classic SEA (South East Asia) camouflage, which means Light Green (FS 34102, "Gunze"303), Dark Green (FS 34079, "Gunze"309) and Brown (FS 30219, "Gunze"310) and White (FS 17875, "Gunze"316) for the underbelly. To get the pattern right it’s best to go along with the "Tamiya" instructions, there you get a good visual of the camouflage. When painting was done a layer of clear ("Gunze 30") was applied, after some drying I used a mix of kit and "Iliad Design" decals to get all the markings, finally another layer of clear ("Gunze 20").
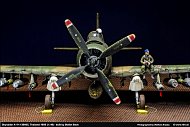
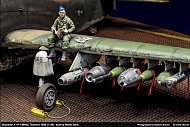
1st SOS main task was supporting the boys down on the ground and rescue missions so the weapons had to be chosen carefully. Mk. 77 ("Eduard") and BLU-10 napalm bombs ("True Details") are a basic configuration, another useful weapon was the LAU-3A ("True Details") rocket pod, which fired smoke or white phosphorus rockets. On the outer hardpoints I used CBU-14A7A launchers, which are completely scratch built, "Albion"tubes and some plastic parts do the job. CBU-14A7A launchers fired cluster bombs to the rear with devastating effects on large areas. For dumb bombs I used Mk. 117 ("Eduard") and Mk. 82 ("Eduard") with daisycutter device.
Daisycutter, what does that mean? Well... Vietnam is known for heavy soil, rice paddies and dense jungle. If you drop a bomb, it will penetrate this soft ground quite deep till the impact fuse will fire and the bomb detonates. So the bomb is buried in soil before it explodes and you lose a lot of fragmentation. With the impact fuse at front of the tube extension the fuse will also get deep into soft ground but the bomb itself won’t be completely buried and can expand quite deadly. Who came first with the cynical title "daisycutter" is not known, a typical example of military nomenclature.
For the last weapons station I used a SUU-11A/A minigun pod from "Aerobonus". Everything was painted in grey and green tones, for napalm bombs and CBU-14A7A I used "Alclad" colors.
 Color effects & weathering ... Color effects & weathering ...
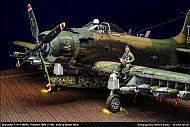
Time for some color effects and heavy weathering! First of all some washings to get the best out of the details and panel lines, another method is to accent shadows and highlights with oil colors, very effective. The radial engine of Skyraiders had some issues with oil loss so this should be represented in model form too. Speaking of heavy weathering the centreline tank ("Attack Squadron") was also much abused, they used it over and over again...no drop tank.
Ready with all washings, paint effects and weathering, don’t forget to mount all the small details e.g.: antennas on the back and gun barrels ("Quickboost"), the position light on top of the tail and the antenna wire ("E Z Line"). For some eyecandy a pilot helmet ("True Details") was placed on the glazing.
 Pilot & base ... Pilot & base ...
Did I mention a pilot...well it was planned from the start on to integrate a pilot. Head and torso are "Aerobonus" parts, legs and arms are scratchbuilt to get the right pose. His reading is, of course, some Playboy magazine’s of that era...obviously he also has found his Sandy. To recreate the soot and exhaust stain I used pigment powders ("MIG Productions"). Add them carefully in a most authentic way, photos can show you where to place them. Finally I mounted the aircraft on an already painted and cut PSP airfield ("Eduard") and glued it tight. Some wheel chocks ("Aerobonus") secure the Skyraider and a lot of "remove before flight" tags ("Eduard") ensure weapons safety.
 Conclusion Conclusion
Overall this was quite a demanding project. Resin and etched brass require a lot of time and preparation which was needed to get the basic kit to acceptable standards. All in all everything worked fine and the Skyraider turned out great. |
| |
 |
| |
| |
 |
 |
 |
|
 |
 |
 |
| |
meet the modeler |
|
|
|
| |
Stefan Beck |
|
|
|
| |
|
|
|
|
| |
My name is Stefan Beck. I began modeling very early, probably since I started thinking. Like many others I started with Airfix and Esci. As the years passed and the modeling budget increased the subject matter also grew in complexity. I now build (civilian) motorcycles, (military) dioramas and figures but also Science Fiction (Warhammer 40000) in diverse scales (1:12 to 1:285).
If you have questions or constructive criticism donít hesitate and contact me. |
|
 |
|
| |
|
|
|
|
| |
Email:  stefanbeck@inode.at stefanbeck@inode.at |
|
|
|
| |
|
|
|
|
|
|
 |
 |
 |
 |
This page: GALLERY: Skyraider A-1H 139665 (1/48), built by Stefan Beck
was last modified on: Feb 14, 2017
The URL of the page is: http://www.rlm.at/cont/gal49_e.htm
© Copyright www.rlm.at and the contributing author(s). All Rights Reserved. Used with permission.
Terms of use: All material within this site is protected under copyright
and may only be reproduced for personal use. You must contact the Author(s)
and/or Editor for permission to use any material on this site for any purpose
other than private use! |
| |
|


