|
|
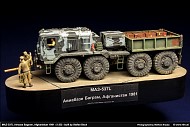
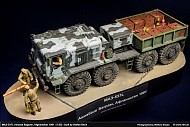
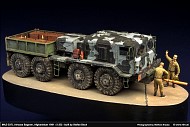
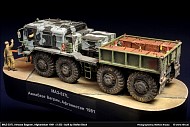
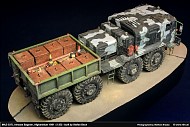
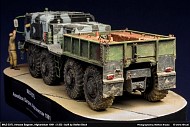
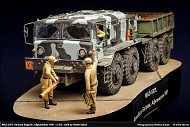
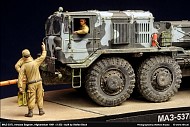
MAZ-537L, Airbase Bagram, Afghanistan 1981 |
 |
built by Stefan Beck (1/35) |
| |
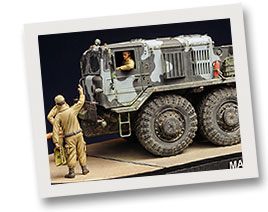
The MAZ 537 family of vehicles is since the early 1960ies on duty, designed and built in the Russian factory "Minski Awtomobilny Sawod" (MAZ) for Car factory of Minsk.
The basic version has an all wheel drive (8x8), the 2 front axles are steered. Engine power is 520 hp; a tire pressure control system is also on board. MAZ 537s are around worldwide and used in many different variant, e.g.: as tank transporter, tractor for intercontinental missiles or as model MAZ 537L in the airfield tractor role. Special about this version is the loading platform; it’s used to carry raw steel ingots to get the most needed down force. Only with maximum down force it’s possible to tow heavy loads like a loaded Antonov 22 without spinning wheels. Fortunately "Trumpeter" provides this version as a kit, so nothing to wait for; let’s built it!
 The kit The kit
After opening the "Trumpeter" box you soon recognise frame and suspensions are very detailed and quite tedious to build. So take your time to get everything straight and even. Check twice, glue once is the name of the game. The included soft vinyl tires are not very satisfying so I used replacements from "Tank Workshop", well these resin tires are badly cast and covered with speckles caused by trapped air bubbles, the rim is also wrong. Only chance was to get one tire up to acceptable standards, mill out the rim and recast that for further use. For general details the etched metal set from "Voyager" was used, especially the large panels for the wheel covering are very nice and give some fragile appearance.
But we need more improvements; to get more details into the interior I scratch built the typical sun visor, some wires and cables to the dashboard and steering wheel, also the seats get some details for a realistic look. On the exterior we have also some work to do, again we need some hydraulic lines on the frame. Apparently there is no engine included in the kit. So I scratched an engine dummy to be placed into the engine compartment; this prevents the feared see thru effect if looked thru the ventilation openings. A protective screen closes the engine bay; so what’s missing - right - on the whole kit are no welding seams! Particularly the loading platform is a fully welded construction, well; I added ALL welding seams with "Milliput", laborious work I can tell you. |
| |
| |
 |
|
| |
 Painting Painting
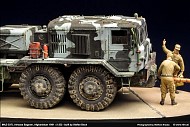
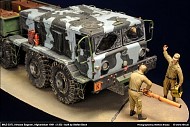
The light blue/black camouflage pattern shown in the kit instructions appealed to me a lot, always wanted to do something fancy like this! First all components (cabin, engine bay, tank and winch) of the truck were getting a Primer; followed by a coat of black pre-shading. Next I mixed a light blue colour by eyeballing the hue; "Tamiya" acrylics were used. Airbrushing in thin layers is the key for a nice finish, post shading was done with a lighter hue, don’t over exaggerate the effect, and keep it subtle. Now for the complex camouflage pattern, I used a product called "Intelligent Panzer Putty" from "MXpession".
This, not so silly, putty is very flexible and conforms well to all surface detail, due to its low adhesion it’s the best tool for difficult masking. So with putty on I applied dark grey, again post shading is done with a lighter variant of the dark grey. For the loading platform the same procedure was used, of course all in different greens, pre and post shading was used for good effect.
Frame and wheels/rims were also airbrushed in different shades of dark grey. Never use straight black, it looks too gaudy in 1:35 scale!
 Weathering Weathering
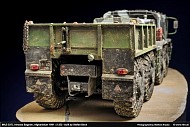
After completing the painting stage, now for the funny part, called weathering. As the saying goes "the less the better", true - but not easy to follow. First step is chipping, applied with a small sponge, finalized with a fine pointed paintbrush. We need several layers of chips; each colour of the camo has its own chippings! Next is weathering with pigments, nice dusty effects can be achieved with this medium, again don’t stress these effects too much. Other effects like spilled fuel or rain marks were realised, all the tank area is quite filthy and heavy used. The loading area is a true paradise for all kinds of weathering methods. Here rust, chipping, dust and all other effects of heavy usage are spot on, if it looks good, it is good!
 Payload Payload
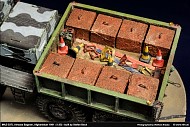
As mentioned earlier the payload consists of raw steel blocks to get the needed down force. So these chunks of iron needed replication, but how? After some research I got the dimensions measured, some cut Styrodur was used for the cubic shape; coated with coarse modelling paste and presto...weights are ready to be loaded. All jerry cans are the Russian type, available from "tank", signal cones are provided by "Accurate Armour". Shackles and chains are from the "RB model" brand. To get some connection to the airfield theme I used some wheel chocks in the Russian variation. "HAD Models" and "Brengun" are the names to call; the towing bar is scratch built. By the way - scratch building.
 Ground crew & airfield Ground crew & airfield
To get a human touch some figures are much needed. Especially the driver was already planned in the building process of the cab to get a snug fit behind the steering wheel and his seat. After modelling and painting this guy it was quite a mission to get him thru the window and place him where he belongs to be. His two buddies handling the tow bar are scratch built too. Heads are "Hornet" items; headgear is of "ICM" origin. All crewmembers are painted with "Vallejo" acrylics, nothing special to mention.
To get all elements tied together we need some groundwork, in this case it’s a part of an airfield in Afghanistan. Easy task, just cut down some Styrodur, engrave the concrete panel lines and do the grouting with "Milliput". Painting is done with "Tamiya" colours; dusting with pigments will do the trick.
 Conclusion Conclusion
An original full of character will become a nice scale model, that’s particular true for this project. So if you always wanted to paint a black/baby blue camouflage go for this one! |
| |
 |
| |
| |
 |
 |
 |
|
 |
 |
 |
| |
meet the modeler |
|
|
|
| |
Stefan Beck |
|
|
|
| |
|
|
|
|
| |
My name is Stefan Beck. I began modeling very early, probably since I started thinking. Like many others I started with Airfix and Esci. As the years passed and the modeling budget increased the subject matter also grew in complexity. I now build (civilian) motorcycles, (military) dioramas and figures but also Science Fiction (Warhammer 40000) in diverse scales (1:12 to 1:285).
If you have questions or constructive criticism donít hesitate and contact me. |
|
 |
|
| |
|
|
|
|
| |
Email:  stefanbeck@inode.at stefanbeck@inode.at |
|
|
|
| |
|
|
|
|
|
|
 |
 |
 |
 |
This page: GALLERY: MAZ-537L, Airbase Bagram, Afghanistan 1981 (1:35), built by Stefan Beck
was last modified on: Sep 13, 2015
The URL of the page is: http://www.rlm.at/cont/gal46_e.htm
© Copyright www.rlm.at and the contributing author(s). All Rights Reserved. Used with permission.
Terms of use: All material within this site is protected under copyright
and may only be reproduced for personal use. You must contact the Author(s)
and/or Editor for permission to use any material on this site for any purpose
other than private use! |
| |
|


